Oh, I have finally approached the granny hexagon tutorial! uff! It was fun and hope it's clear enough to follow:)
By the way my crochet knitting is improving day by day, so the last crochet hexagons I made were much neater than the first ones :) Here is the small tutorial, where I'm trying to highlight some moments which were difficult for me and what I finally understood about making granny hexagons. Choose yarn of you preferred colours. I liked that emerald yarn. Hook number is 2.5 mm, which is my favorite.Below are some examples of the hexagons I came up with.


Row 2. Crochet 3ch + 2ch (for "bridge") = 5ch:


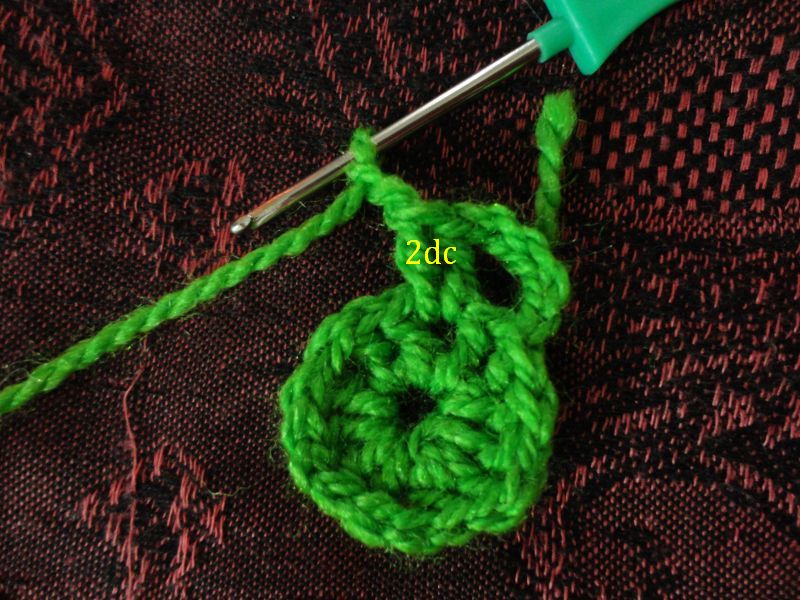
Row 3. Crochet 3ch. Make 2dc in the big loop.


 .
.
3dc+1ch+3dc in the corner. You have to alternate further: 3dc into the big loop, then 3dc+1ch+3dc into the each corner. Finish the row.


By the way my crochet knitting is improving day by day, so the last crochet hexagons I made were much neater than the first ones :) Here is the small tutorial, where I'm trying to highlight some moments which were difficult for me and what I finally understood about making granny hexagons. Choose yarn of you preferred colours. I liked that emerald yarn. Hook number is 2.5 mm, which is my favorite.Below are some examples of the hexagons I came up with.

I used only chain (ch) and double crochet (dc) to create a hexagon. Also I am using US crochet terminology as it's close to a Russian (UK "dc" is called "treble crochet" trc).One more note: as soon as this creation called "hexagon", which has 6 edges and 6 vertices, so the crochet item will look exactly like this and you will have to keep number 6 in mind all the time while making it.
First chain 6, draw yarn under two threads of the first chain. You don't have to make any stitch now as you just connecting the ends of the ring:

Row 1. Crochet 3ch. Can you see three chains in the picture below? So this is the beginning of a 2nd row, and these 3 chains, as far as I understood, "imitate" double crochet. This will simply equal your rows further.

Crochet in the round (in the ring) 11dc. After finishing the last dc chain 1 and connect it to the first 3ch ("imitation" of dc, remember?).
Connection of the first 3ch and last dc -
insert the hook under the upper chain of the first 3ch.
insert the hook under the upper chain of the first 3ch.

Slip on and draw yarn throw, you have 2 loops now, draw yarn throw the second loop

one loop will be left:


2dc into the big loop + 2ch

Continue making 2dc in each big loop and 2ch (between 2dc pairs). Connect the last dc and first 3ch.


2ch ("bridge"), 3dc under the next big loop + 2ch. Do like this 4 more times. So you will have 3dc in each out of 6 loops. Join the last 2ch with the first 3ch.
(You can see that it folds a bit in the picture, but it is alright as we will be adding more dc in the next row).

Row 4. Crochet 3ch + 1ch. Then make: 3dc + 1ch + 3dc in the first big loop. 1ch. Then
3dc + 1ch + 3dc into the second loop, then 1ch. Do same (
3dc + 1ch + 3dc ) in all big loops. Finish the row by connecting last 2dc to the first 3ch:

The row 4 will form the corners of the hexagon, can you see them in the picture above?
After you finish this row, count the number of all the stitches in the corners and in the loops in order to see mistakes (if they are present) and ...CARRY ON!
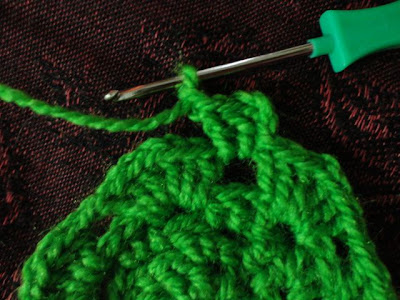
Row 5. Crochet 3ch + 2 more dc in the first loop + 1ch ("bridge").
3dc+1ch+3dc in the corner. You have to alternate further: 3dc into the big loop, then 3dc+1ch+3dc into the each corner. Finish the row.

This is how your 6 corners have to look like.

You can stop expanding hexagon now or continue and make it as big as you want, depending on the project you are up to.
